Secure Checkout + FREE SHIPPING (U.S. Orders over $60)
Menu
-
- Home
-
About Us
-
The Approach
-
Linking Language & Literacy
-
Professional Learning
-
Learning Resources
-
SHOP
-
Blog
-
- About MindWing
- Our People
- Contact Us
- Your Account
- Login
-
United States (USD $)
Secure Checkout + FREE SHIPPING (U.S. Orders over $60)
Hands-On Activities for Beginning, Middle and End of a Story
by Sheila Zagula April 28, 2016 4 min read 1 Comment
 Asking students to tell or write a story with a beginning, middle, and end is a daunting task for most. Teaching the narrative structure in a developmental fashion using the SGM methodology is a powerful tool to instruct students in language, comprehension, and writing. The SGM® is an iconic-based tool that (developmentally) represents the necessary elements of story grammar and story organization. (Shown at right is the SGM® Student Marker.)
 We have received a great deal of positive feedback on our post from March 29, 2016, Fun Activity to Reinforce the “Kick-Off” using the Kick-Off icon and the book The Doorbell Rang. I thought I would share another similar activity using craft sticks and the SGM® icons to help teach the components of the beginning, middle, and end of a story.
![]() Create a set of SGM® icon sticks as shown. You may want to have more than one set available for small groups of students. I used the
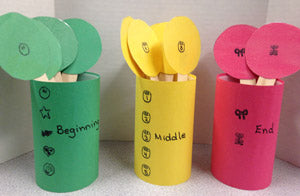
Create a set of SGM® icon sticks as shown. You may want to have more than one set available for small groups of students. I used the 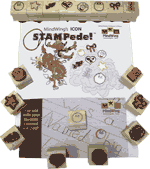 SGM® STAMPede stamps and colored paper: green for the icons present in the beginning of a story; yellow for the icons in the middle; and red for the icons which make up the end of a story.
I laminated the icon circles and attached them to craft sticks. As teachers, we all like materials to be stored so that they are easily accessible.
Using empty ice tea containers (shown below), I covered them with colored paper and stamped the icons representing the beginning, middle, and end of the story. Not only were the sticks easy to use but also again the color-coding helps to reinforce the teaching of story elements.

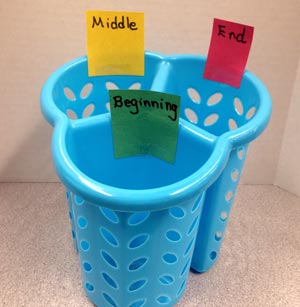
I also recently came across a storage container at our local CVS store that worked perfectly for this activity.
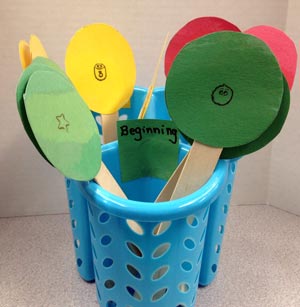
 These icon sticks may now be used in a variety of ways. For example, after reading a story to the students and retelling the story with the SGM® Marker, (I will use Bear Feels Scared, an April 8, 2016 blog post.) Tell the students that we will be talking about the beginning of the story. Ask them to take out the sticks (green) that represent the beginning of the story and place them on the table in front of themselves. Then, ask students to hold up the correct icon stick that goes with the following prompts:
- The woods is the _____________________. (Setting)
- There was a terrible storm in the woods. (Kick-Off)
- Bear was worried and afraid. (Feeling)
- Bear’s friends decided to go and find him. (Plan)
- Bear, rabbit, owl, mole are all ______________. (Character)
- Bear felt safe and loved. (Resolution)
- The lair is ___________________. (Setting)
- Bear learned that he has great friends. (Resolution)
- The first thing that bear’s friends did was bundle up. (Attempt/Action #1)
As you can see, any story could be adapted to use with this activity.
Students could also each be given a stick and asked to come up with a group story (the student with the Character stick would name/describe the Character; the student holding the Setting icon stick would say where the story will take place, etc.) The teacher could provide as much support as needed, based upon the students.
If a student is just starting to learn the icons, take out all the sticks and ask him/her to put them in order. Then discuss the beginning, middle, and end of the story. If a student is unable to do this, use the SGM® Teacher Marker as a guide, pointing to each icon as students place the sticks in order.
 You may want to use our Clothesline Activity, color-coded, with any story that would contain visuals of the story components. Students may also hold the pictures and line up in order rather than using the clothesline. Then, the students could each retell his/her part in order. Ask those who have just the middle components of the story to sit down and discuss with the students how a story with a beginning and end would not be complete…we would not know how the Character(s) got to the ending.
Working with individual students, based upon each child’s developmental stage, would also be easily accomplished with these sticks. (Checklist shown below is from The Story Grammar Marker Teachers’ Manual.) If a child, for example, was at the Action Sequence, then having the Character, Setting, and Action icon sticks available would help reinforce the macro structure of this stage. Then, add the Kick-Off stick to guide the student to the Reactive Sequence.

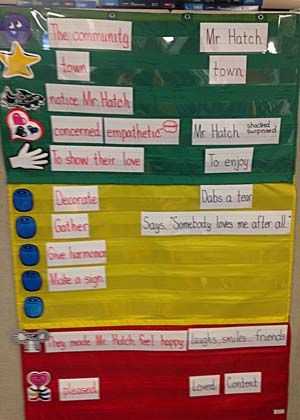 Using a color coded pocket chart is also another way to reinforce story elements of the beginning, middle, and end of a story of your choice. After retelling the story and showing the completed version of the pocket chart with the sentence strips, take them out and mix up the sentence strips. As you show/read each sentence strip, ask the student to hold up the corresponding icon stick before placing it in the pocket chart. (Chart shown was created using MindWing’s Universal Magnet Set.)
Sheila Zagula
Sheila Zagula works with MindWing Concepts in product development, drawing on her expertise and talents as well as many years of implementing the Story Grammar Marker® and related materials. Her teaching career spans thirty-eight years, most recently as literacy coach in the Westfield Massachusetts Public School System. Sheila has experience as an early childhood educator, a teacher of children with special needs, and a collaborative instructor within an inclusion framework serving children in grades K-5.
1 Response
Leave a comment.
Comments will be approved before showing up.

Trish
May 01, 2016
Always thinking Sheila, I love these new ideas !